Reserve places for the RAH extended tour 2024
If you would like to participate in the next extended tour, please register your interest using the form below and we will contact you with the next available date (expected August 2024).
Feedback

Extended tour details 2024
Woolwich Royal Arsenal History Extended 6 hour tour area
Extended tour route approx. 6 hours long, 5 miles (with lunch break and includes the standard tour route also)
RAH Extended tour form poster
As we walk besides the Thames we came to the ’T Pier’ with the base of the former 200 ton crane nestling beneath. Here are three photos. . Sadly, Antwerp has scrapped the crane.
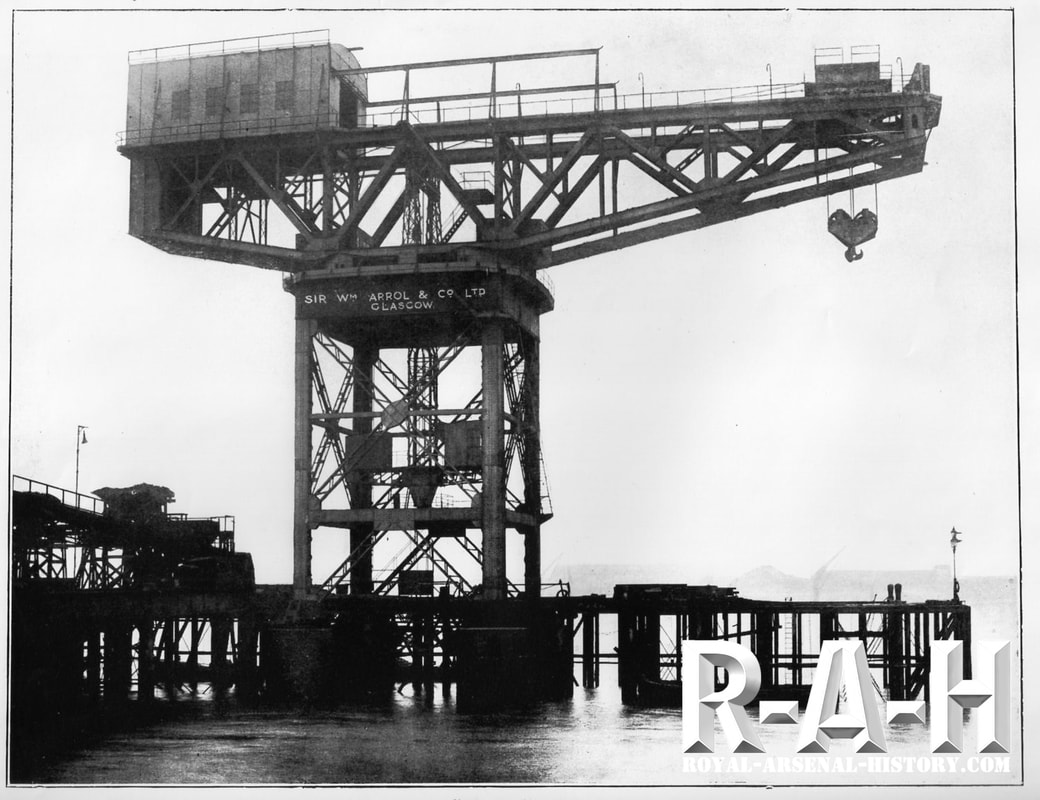
1) 200 Ton crane when undergoing trials at Sir William Arrol’s factory in 1916.
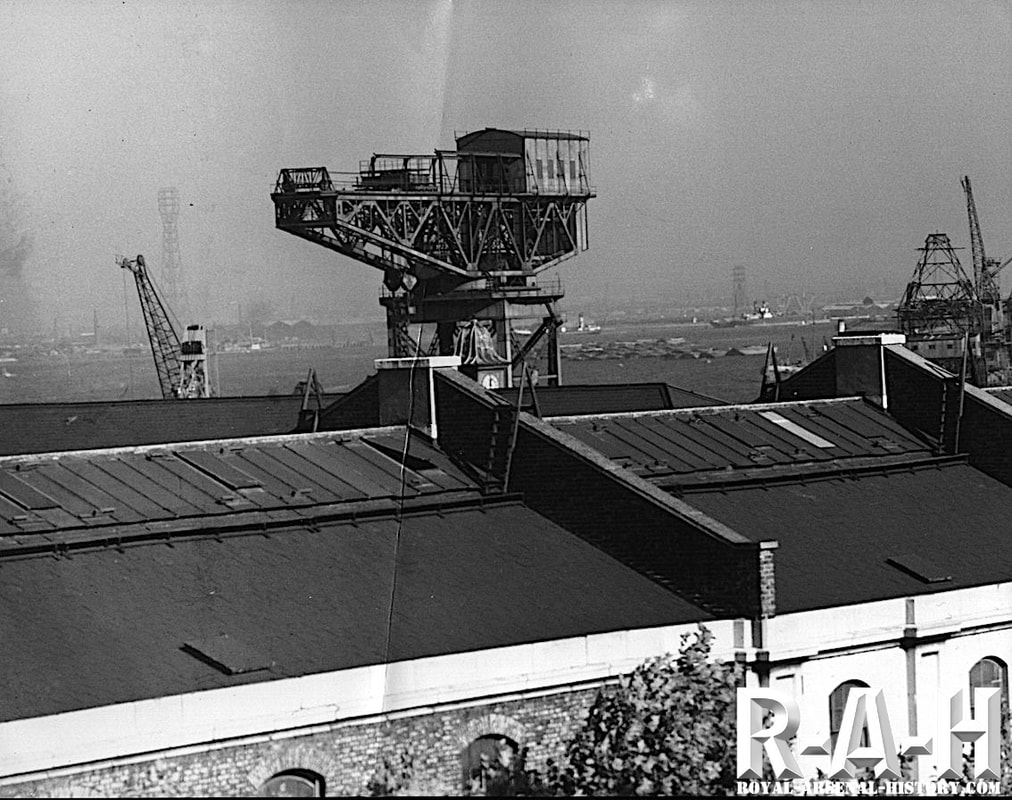
2) The 200 Ton crane from the Central Offices in perhaps 1953, note the Grand Store in the foreground.

3) The crane’s base after the device's sale to Antwerp docks in 1954 and as it remains today. Sadly, Antwerp has since scrapped the crane.
The Coaling Pier will come next with a large coal bunker associated with it. This photo of the bunker dates from about 1955. The photographer is standing on the pier and looking towards the quay we will walk along.
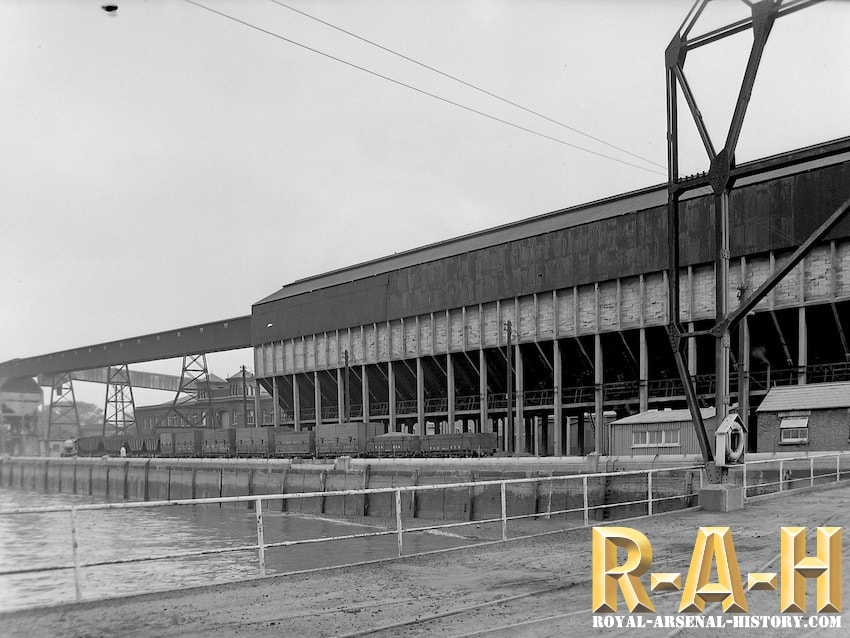
Coal Bunker dates in about 1955. The photographer is standing on the coaling pier and looking towards the quay we’ll walk along.
The next location will be exploration of the loading ramp for Proof Sleighs onto the Arsenal’s roll-on-roll-off barges, the Gog and the Magog. I doubt if any participant knows what a proof sleigh looks like so here are some examples and all were built in the Arsenal.
This is Proof Sleigh No.1 with the then revolutionary 81 ton gun mounted on it. The photo dates from 1886. As guns became larger, so did the proof sleighs.
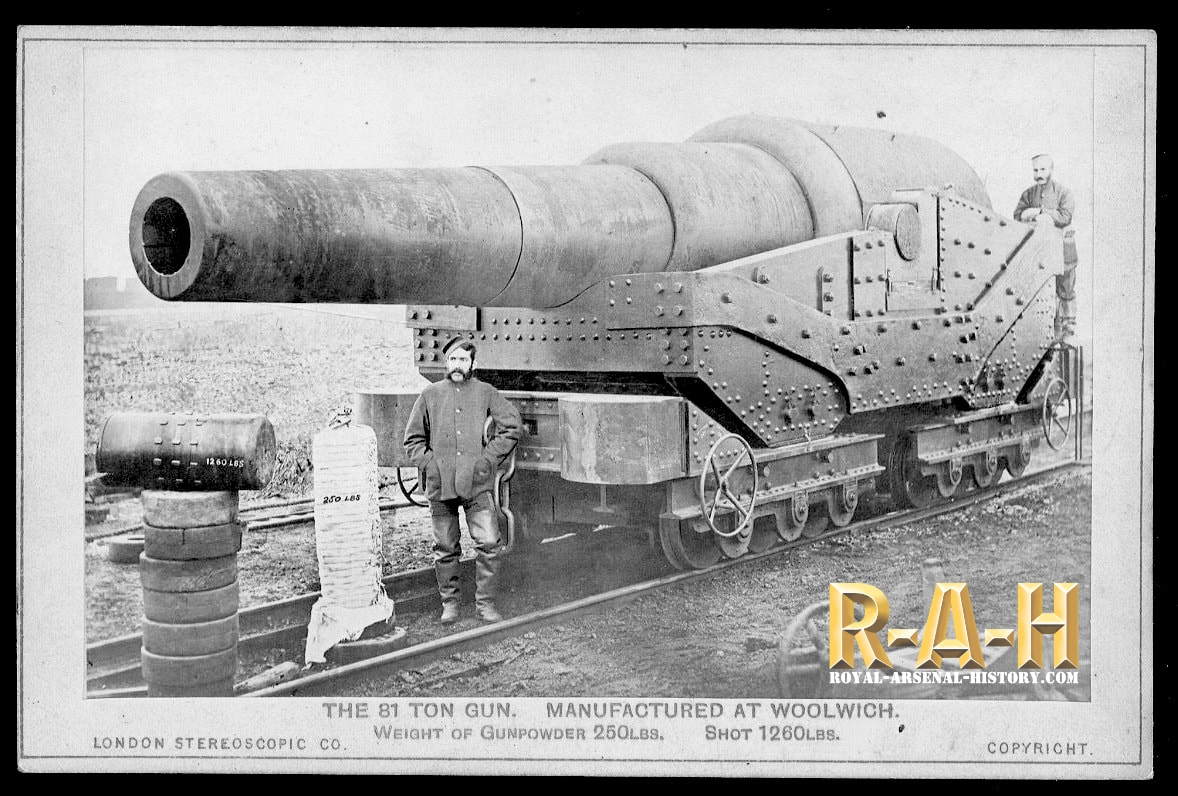
This is Proof Sleigh No.1 with the then revolutionary 81 ton gun mounted on from 1886. As guns became larger, so did the proof sleighs.
This is Proof Sleigh No.11 which survives at The Royal Armouries Museum at Fort Nelson. It mounts an 18 inch Howitzer which, inevitably, was designed and built in the Arsenal.
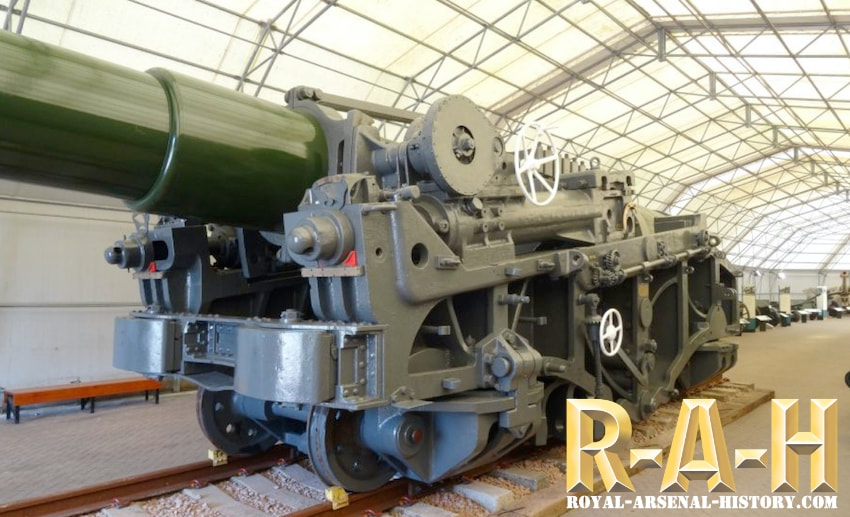
Proof Sleigh No.11 which survives at The Royal Armouries Museum at Fort Nelson. It mounts an 18 inch Howitzer which, inevitably, was designed and built in the Arsenal.
By the time of Proof Sleigh No.12, below, even larger guns had to be accommodated and here it is with a 110 Ton gun. The gun was made by Armstrongs at Elswick near Newcastle and is shown at Woolwich being tested. These guns were not accepted but some were sold to some foreign powers. (The gun on top of the barrel, the Arsenal’s smallest, is preserved. It was often used as a ‘prop’ when large guns were photographed.)
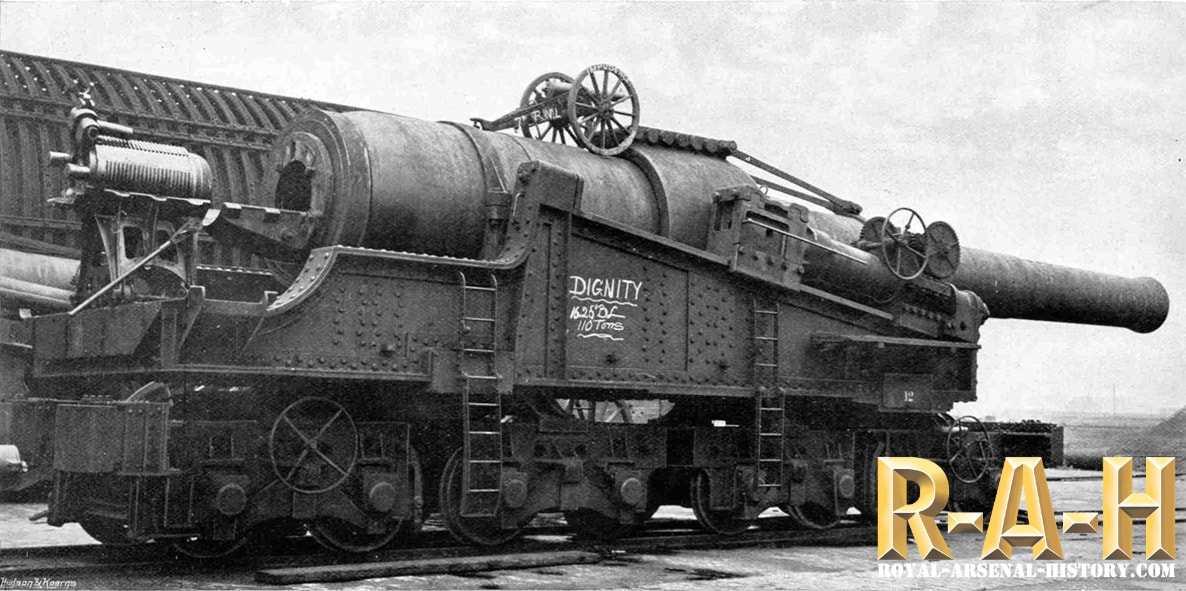
Proof Sleigh No.12, even larger guns had to be accommodated and here it is with a 110 Ton gun
The final development was Proof Sleigh No.20 which was designed for guns that would never be developed thanks to the obsolescence of the battleship. This, when mounting a 16 inch gun, would weigh about 300 tons.
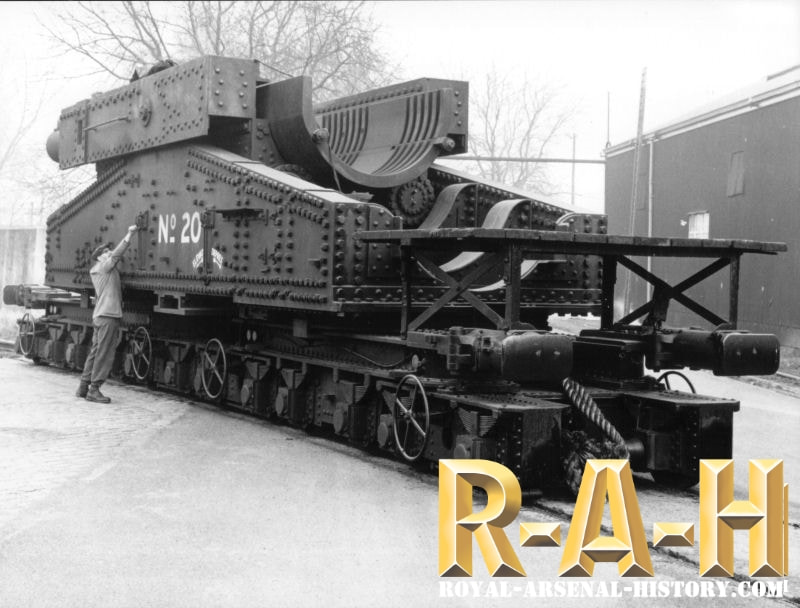
Proof Sleigh No.20 which was designed for guns that would never be developed thanks to the obsolescence of the battleship
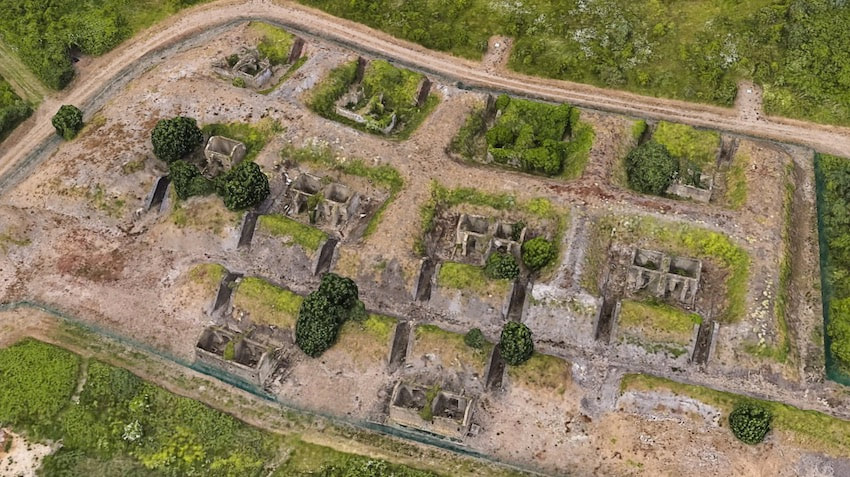
The cluster of surviving Danger Buildings
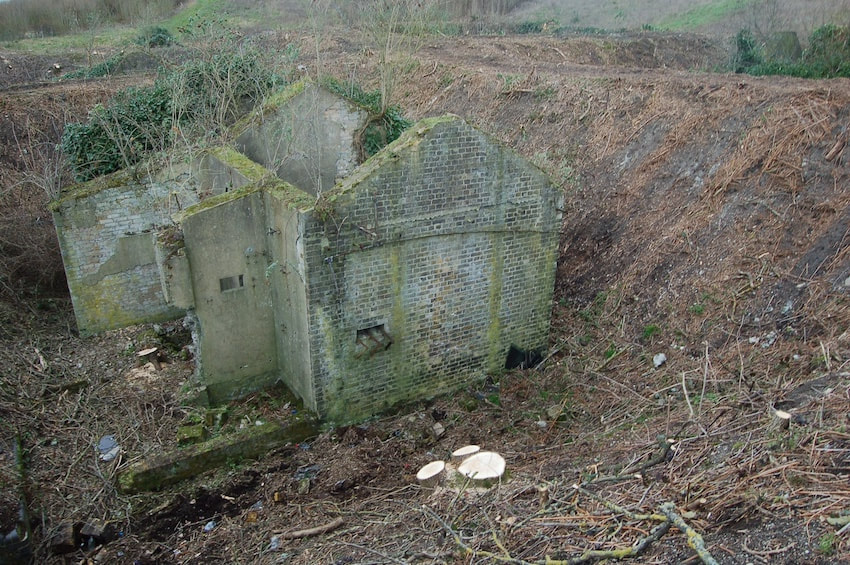
One of the surviving Danger Buildings
Returning from the riverside we will visit the Armstrong Gun factory. There’s a yard in front of the building behind the fence we will stand beside and below is a photo of where we were showing the former 160ton hydraulic crane and the now lost decorative hydraulic accumulator tower.
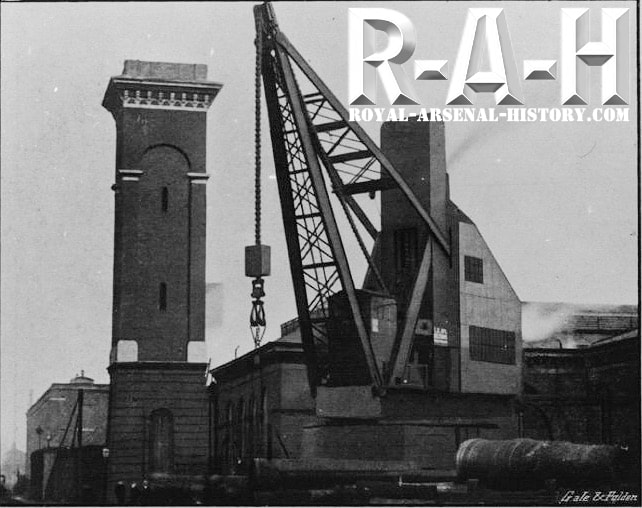
160ton hydraulic crane and decorative hydraulic accumulator tower outside the Armstrong gun factory
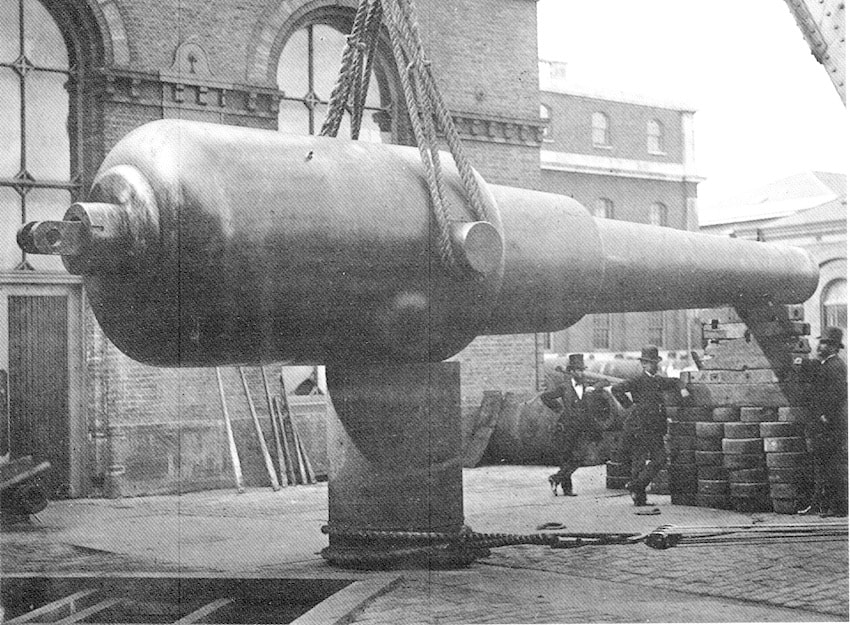
This is a photo of a typical early product outside the building, an Armstrong 41 ton gun in wrought iron. Sir William Armstrong left the Arsenal under something of a cloud. The Arsenal’s own employees, led by a Mr Pearce, developed a superior wrought iron gun about three years after Armstrong had arrived. The Pearce gun used less components than an Armstrong and was considerably stronger although they appear identical externally. Armstrong stormed off…
After the Armstrong Gun Factory, an explanation of why the Grand Store was such a weak building, and the Shell Foundry’s gate house we came to some steam hammer anvils.. The hammer is to the right of the photo and was made by Naysmith & Wilson.
After the Armstrong Gun Factory, an explanation of why the Grand Store was such a weak building, and the Shell Foundry’s gate house we came to some steam hammer anvils.. The hammer is to the right of the photo and was made by Naysmith & Wilson.
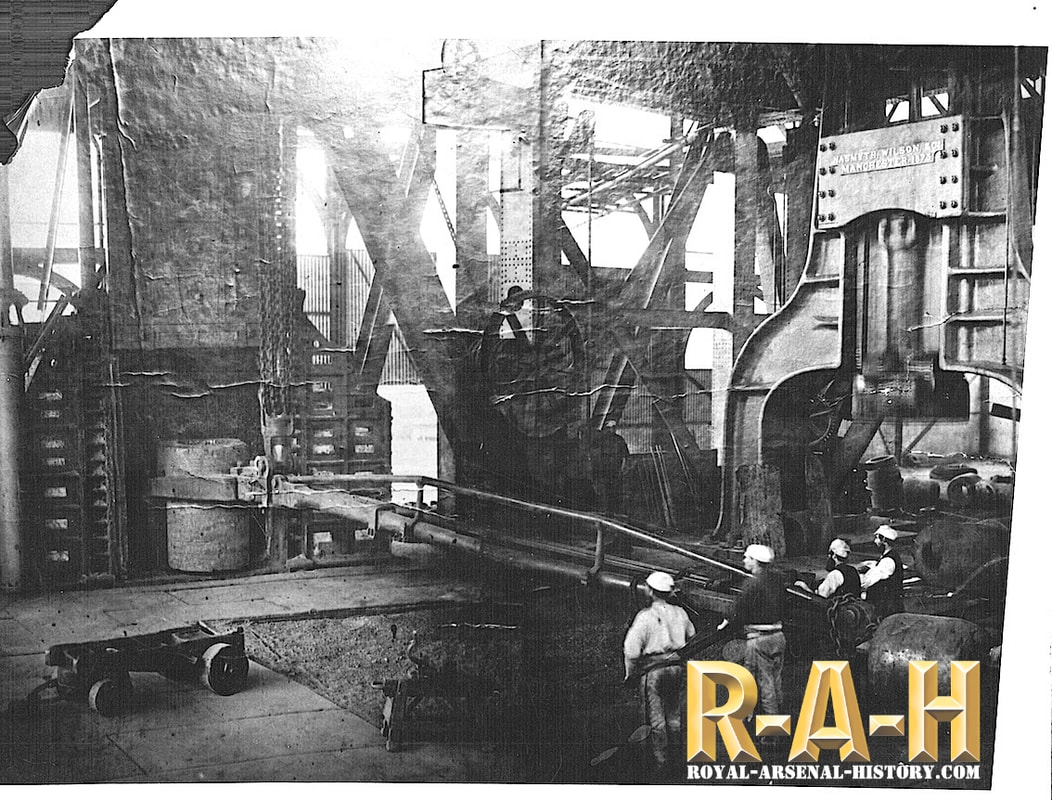
The hammer is to the right of the photo and was made by Naysmith & Wilson
This link may give a better idea. https://archives.imeche.org/archive/industrial/nasmyth/587666-steam-hammer?

Royal Arsenal Steam hammer
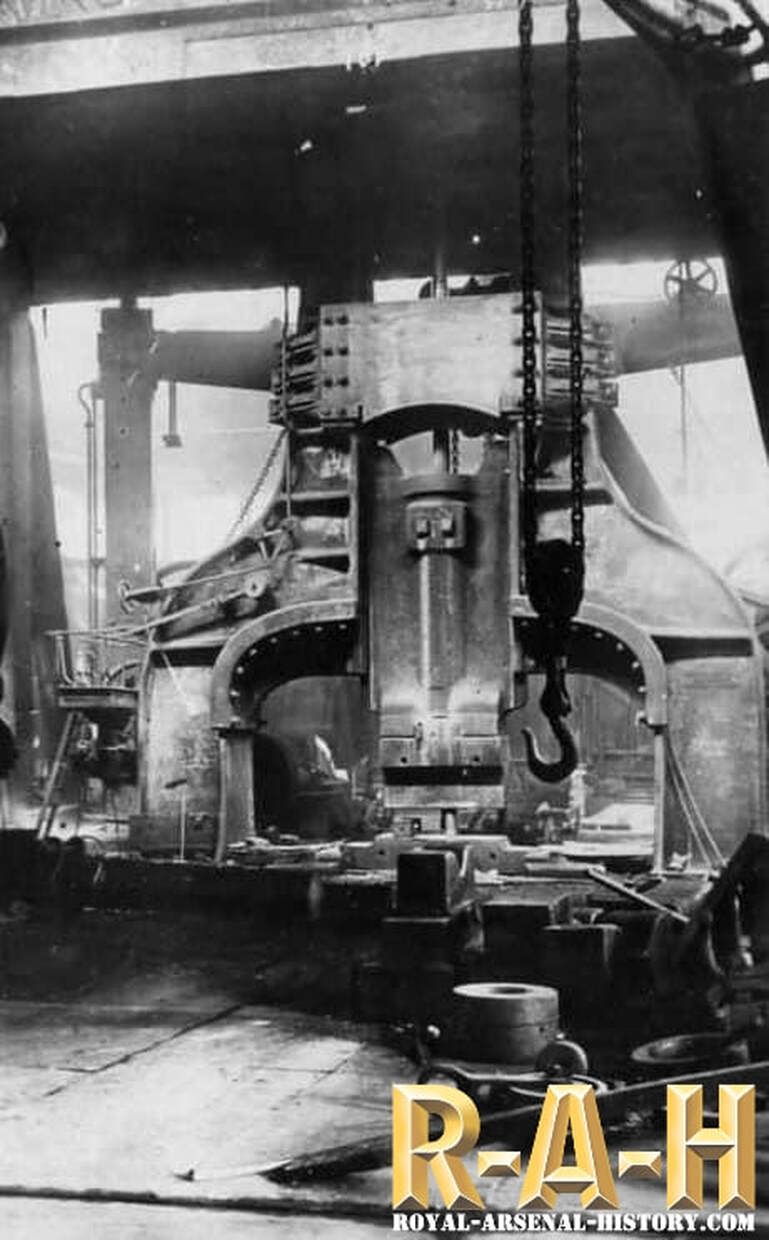
The Arsenal had some of the largest steam hammers in the world but they were replaced with hydraulic presses from 1911 onwards. See below.
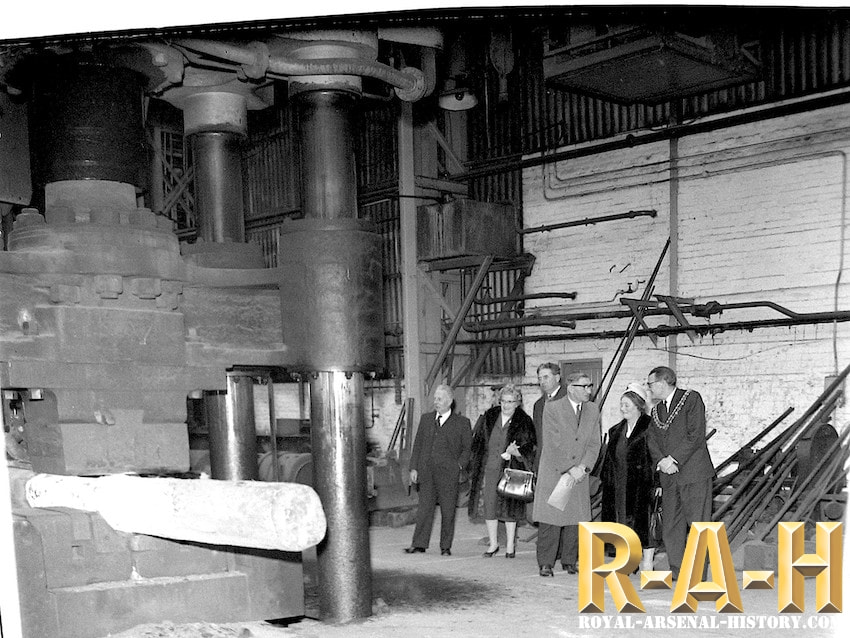
This is a hydraulic press in action during a 1950s Mayoral visit. It’s forming (squeezing) white hot steel into the shape of a gun barrel.
Below are two photos from within building C1, the favourite of all those who know the Royal Arsenal well.
It's also known as the Gun Mounting Shed or Building 19. The photos were taken when it was used as a store by Berkeley Group and whilst messy rather than untidy the scenes do convey the airy spaciousness of this splendid structure.
It's also known as the Gun Mounting Shed or Building 19. The photos were taken when it was used as a store by Berkeley Group and whilst messy rather than untidy the scenes do convey the airy spaciousness of this splendid structure.
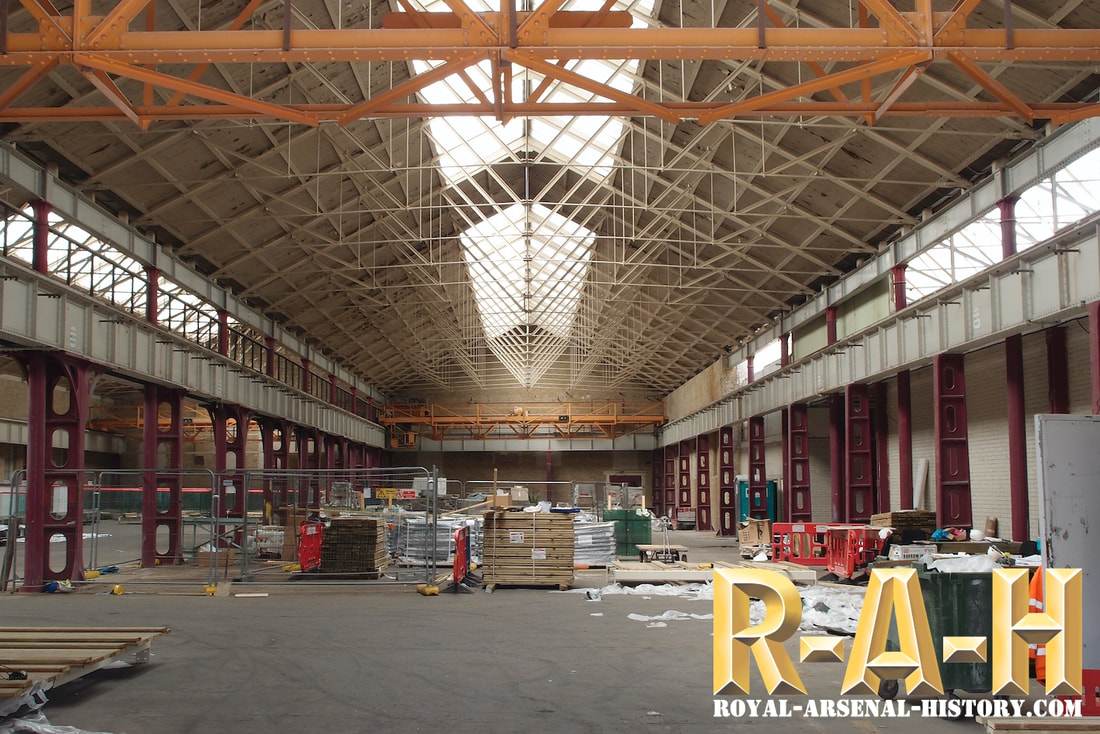
The interior of building C1, the favourite of all those who know the Royal Arsenal well. The building remains almost exactly as built in 1887, right down to the colour of the paint. It is a magnificent survivor and long may it last.
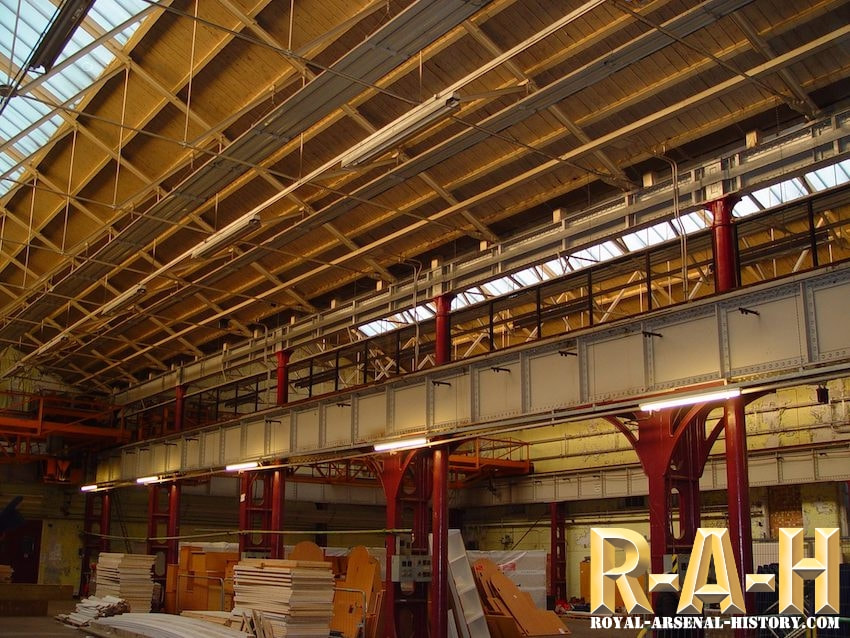
The interior of building C1