Royal Arsenal History
  • Home
  • Royal Arsenal History Tours
  • Royal Arsenal Blog / Forum
  • Royal Arsenal Timeline
  • Video Presentations - Secret City
  • Royal Arsenal West - Woolwich
  • Royal Arsenal East - Thamesmead
    • Ghost Storys from Thamesmead
  • Thamesmead SE28 - A New Town (Video Archive)
  • Royal Arsenal and the Final Years 1967 - 1994
  • Berber (Thamesmead)
  • Magazines (Tumps)
  • Royal Arsenal Explosions
  • Royal Arsenal Railway
  • Royal Arsenal Departments
  • Building numbers, Photos & Maps
  • Thamesmead Street History
  • Royal Arsenal Buildings & Photos
  • Royal Arsenal Site Development
  • Royal Arsenal Archaeology
  • Royal Arsenal Piers
  • Canal, Lock, Dock & Swing Bridge
  • Woolwich Arsenal Prison Hulks
  • Royal Arsenal Wasteland (East)
  • Royal Arsenal Firepower - Guns
  • Royal Arsenal Bombs and Dropped
  • Royal Arsenal Bullets
  • Project Hurricane (Atomic)
  • Royal Arsenal Women Workers
  • Royal Arsenal Employee's
  • Housing the Workers
  • Police and Fire Brigade
  • Royal Arsenal Telephone Exchange
  • Royal Arsenal Transport
  • Royal Arsenal Paymaster
  • Royal Arsenal Medical - Surgery
  • Royal Arsenal Football
  • Life in the Royal Arsenal
  • Royal Arsenal Then and now
  • Royal Arsenal Stories
  • R.O.F.S.A Sports
  • Crossness (East)
  • Royal Arsenal Maps
    • 1700's Maps
    • 1800's Maps
    • 1900's Maps
    • Todays Maps
    • Map overlays
    • Maps unpublsihed
  • Royal Arsenal Photos by year
  • The Royal Arsenal Marshes
  • Royal Arsenal Co-operative Society (RACS)
  • Royal Dockyards
  • Prison Hulks
  • Architecture
  • Artifacts
  • School Projects
  • Family Royal Arsenal research
  • Did you know?
    • Martello Towers
  • After Royal Arsenal closure
  • The Berkeley Group PLC - Royal Arsenal
  • RA Researchers required
  • RAWHS Membership
  • About
  • Contact
  • Upload data
  • New Page
Building Phases
Picture
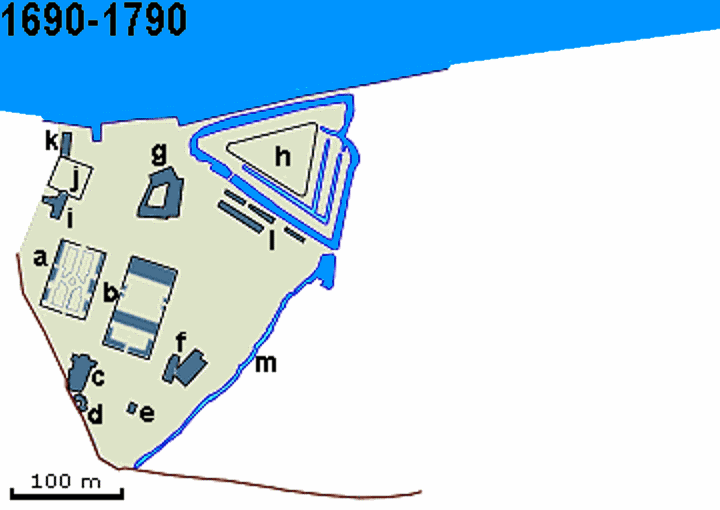
​a - Laboratory Square
b - Great Pile
c - Brass Foundry
d - Guard House
e - Verbruggens' House
f - Officers' Quarters
g - Old Carriage Yard
h - Prince Rupert's Fort
i - Military Academy
j - Shot Yard
k - Old Sea Store
l - Blue Storehouses
m - The stream
Picture
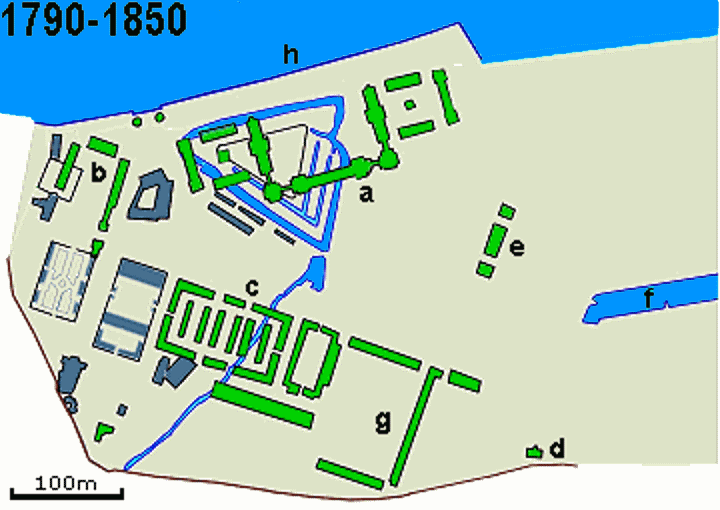
​a - Grand Stores
b - New Laboratory Square
c - Carriage Department
d - Storekeeper's House
e - Stables (?)
f - Canal
g - (left) Engineers' Square
h - New Wharf (compare with 1790 river wall)
Picture

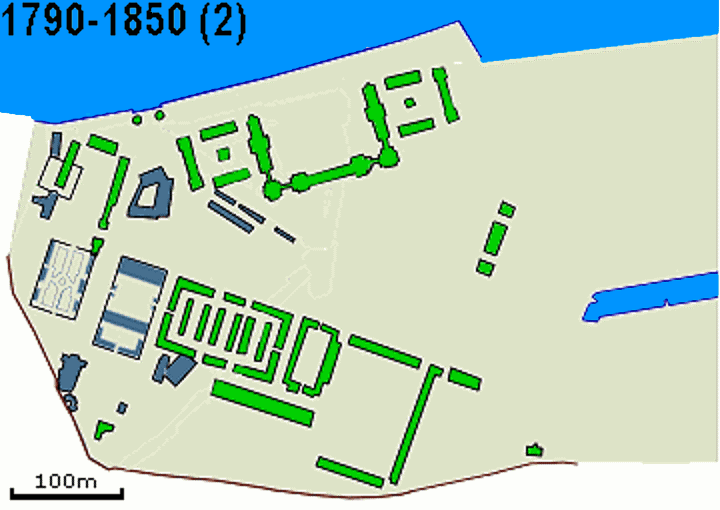
​Both the stream and Prince Rupert's Fort moats are shown above; in reality they were filled in or led into underground culverts. The culvert carrying the stream frequently gives rise to legends of secret tunnels; there are no secret tunnels in the Arsenal, just drains.
Photo to be uploaded
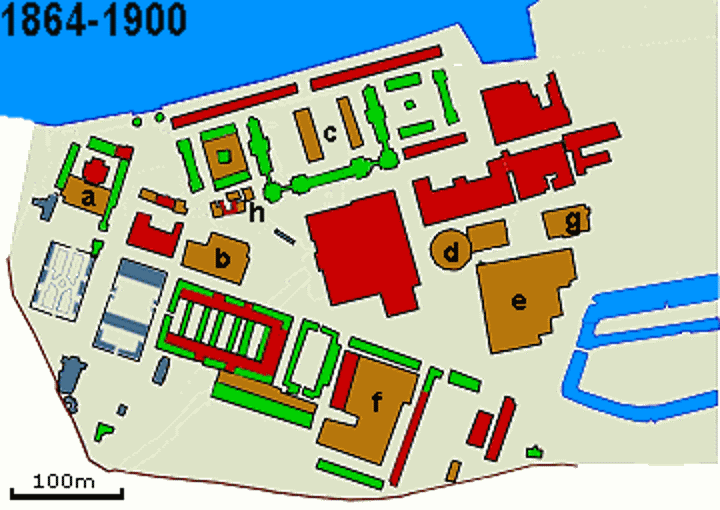
a - Shipping Sheds
b - Friction Tube factory
c - Engine House
d - Royal Laboratory Offices
e - Paper Cartridge Factory
f - Chemical Laboratory
g - Shot and Shell Foundry
h - Armstrong Gun Factory
i - Gun Boring Mill
Picture
a - Carpenters' shop (initially)
b - Mounting Shed
c - Sea Stores
d - Radial Crane
e - Rolling Mill
f - Saw Mill / Timber sheds
g - Rolling Mill
h - Naval Office / Telephone Exchange
Picture


​

​Want to see more?
​


Join our community Facebook Group where you can post your requests and receive answers on research queries, share your stories or family history, photos and recent website updates...
​


Picture
Click to set custom HTML
2021
 © www.royal-arsenal-history.com
© Steven Peterson


To all readers:  Please feel free to report any information listed on this website that is not correct and I will be happy to review and amend. Contact here with your suggestions

Copyright to respectful owners unless otherwise stated, all content and overlays have been compiled by Steven Peterson, admin and founder of www.royal-arsenal-history.com Information sourced from various public resources and people.  Please contact and request authorisation if you wish to use material elsewhere.