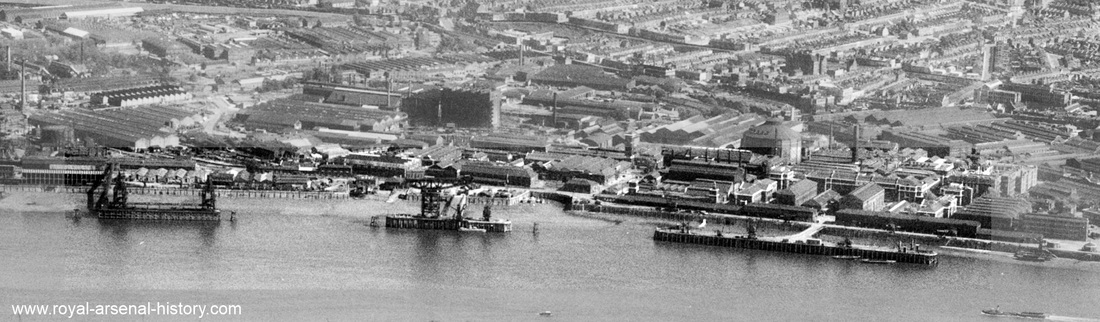
Coal Pier
Along the River Thames are some remains of the piers that serviced the heavy industry of the Royal Arsenal. The below photograph shows what the coal pier looks like today. Now it is a resting place for the gulls and cormorants.
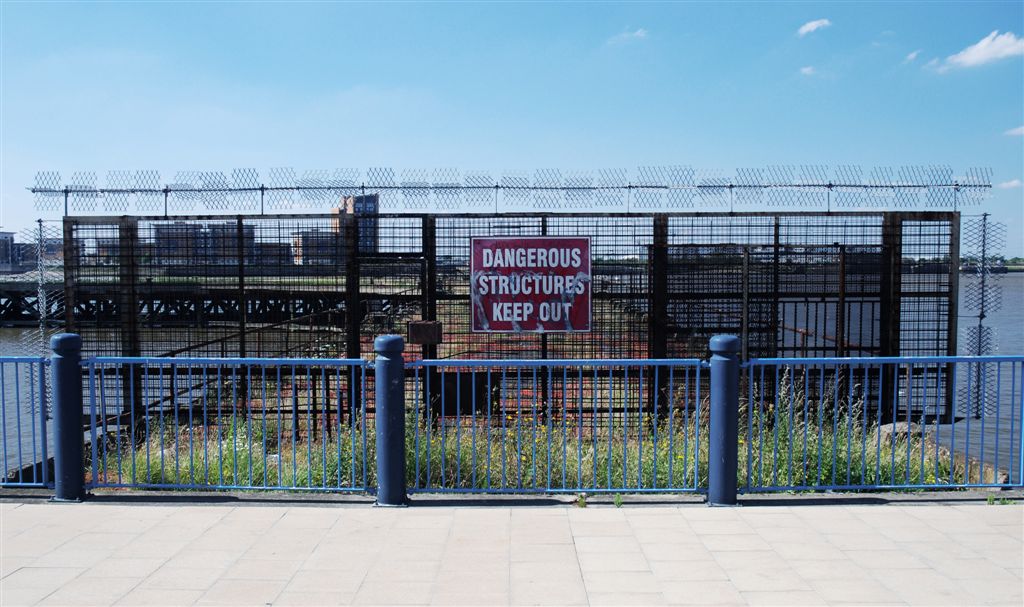
Coaling Pier remains Today
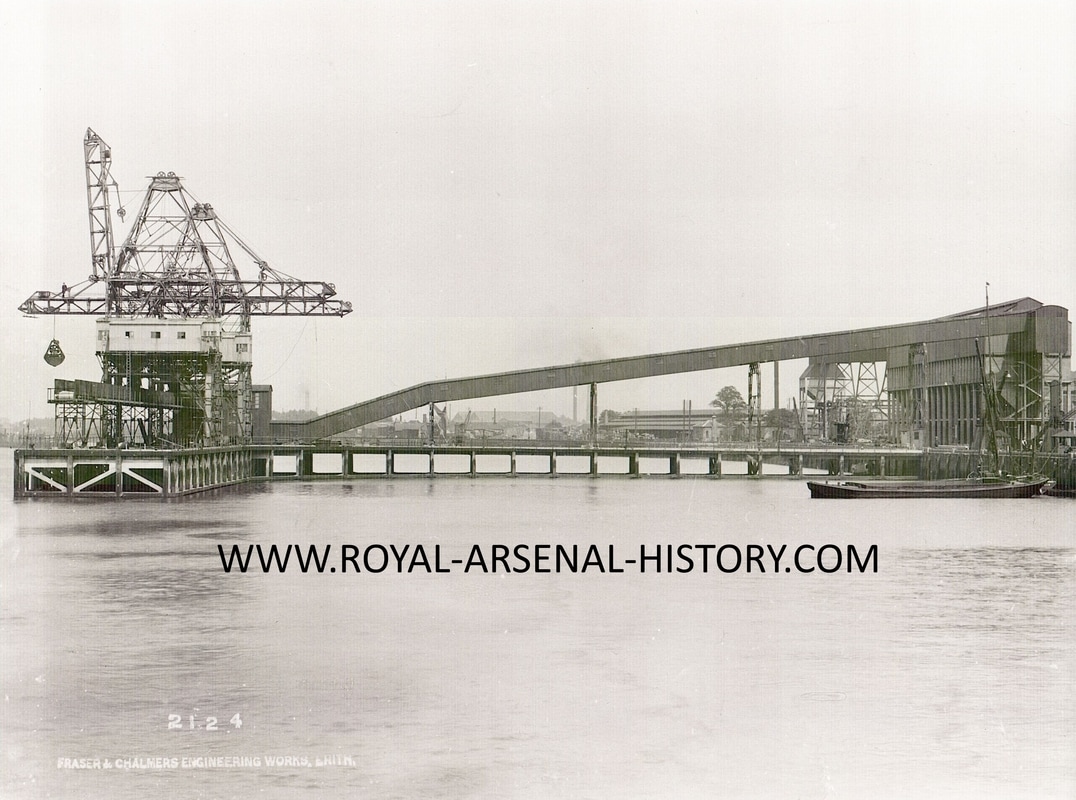
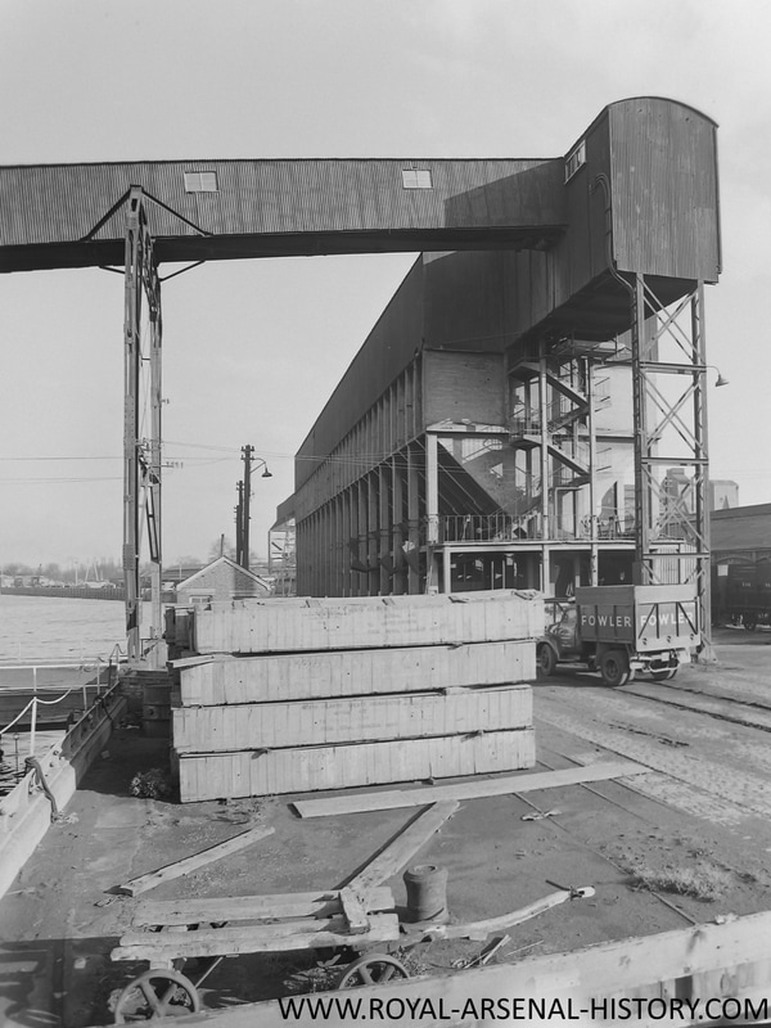
The coal pier at location D6 was Built in 1917-1920 by FRASER & CHALMERS
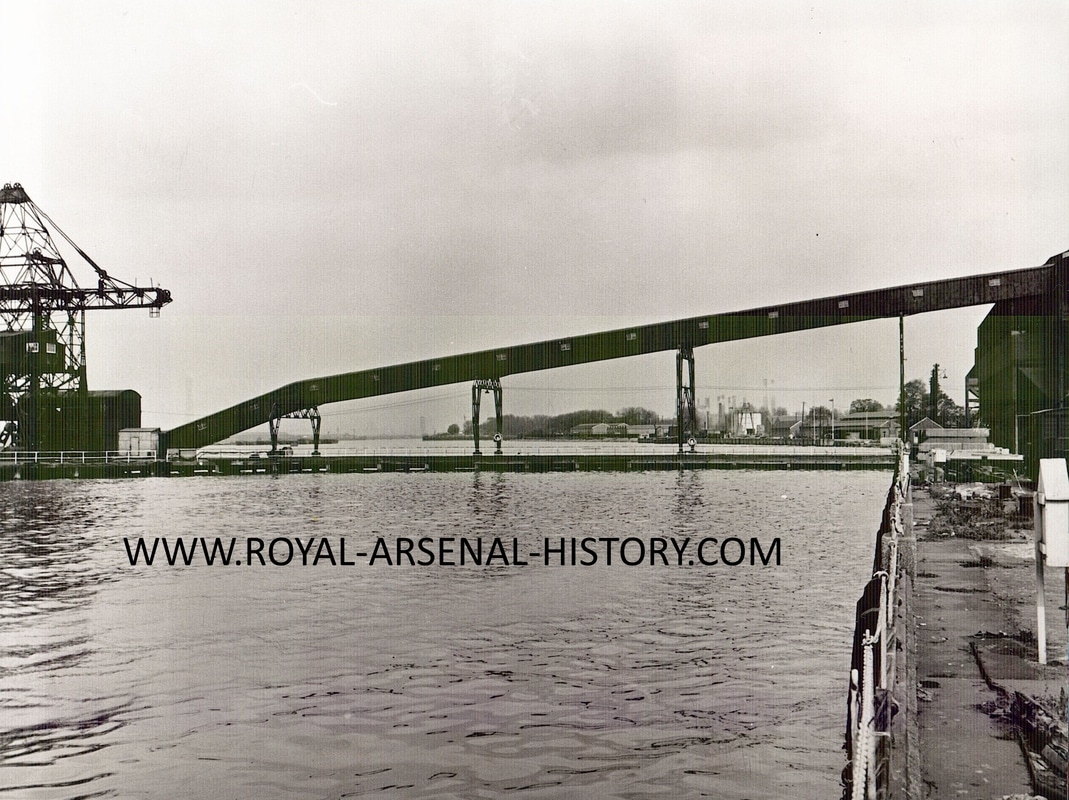
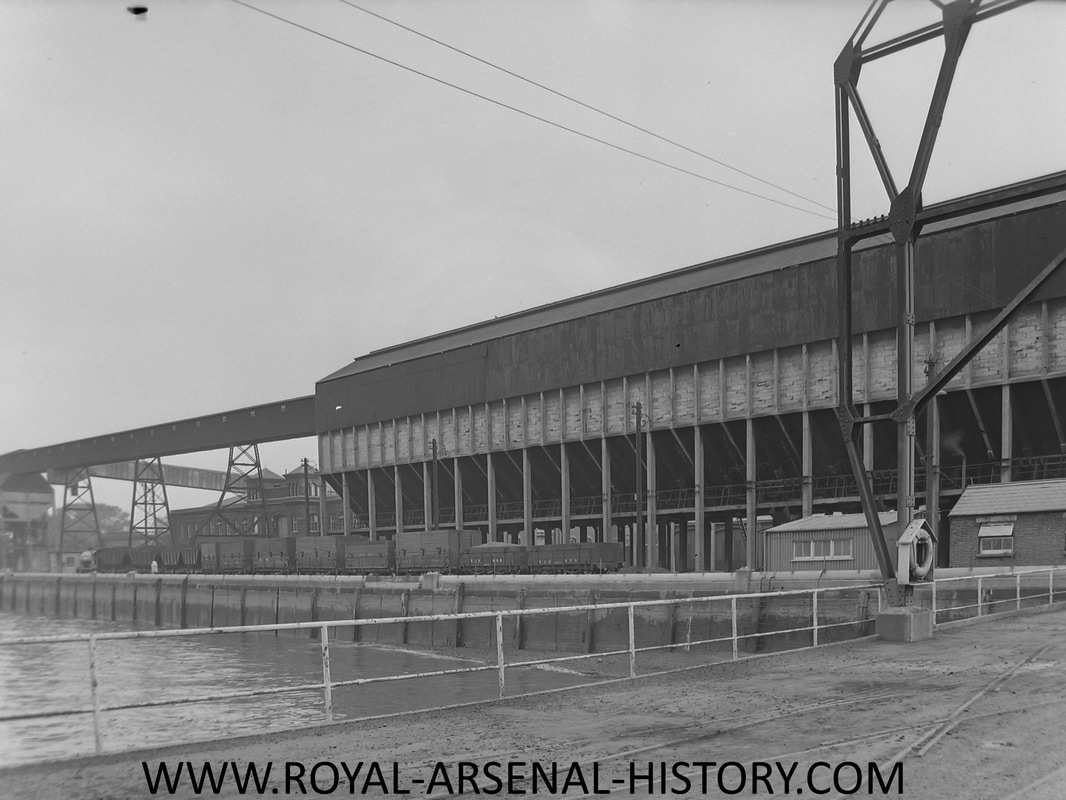
To assist the unloading there were three cranes and five conveyor belts A B C D & E enabling coal to be supplied at coal hoppers (C) and Gas factory (E) the two jibs on the transporters enabled if required for coal to be unloaded from a ship and loaded into barges on the shore side of the pier.
To assist the unloading there were three cranes and five conveyor belts A B C D & E enabling coal to be supplied at coal hoppers (C) and Gas factory (E) the two jibs on the transporters enabled if required for coal to be unloaded from a ship and loaded into barges on the shore side of the pier.
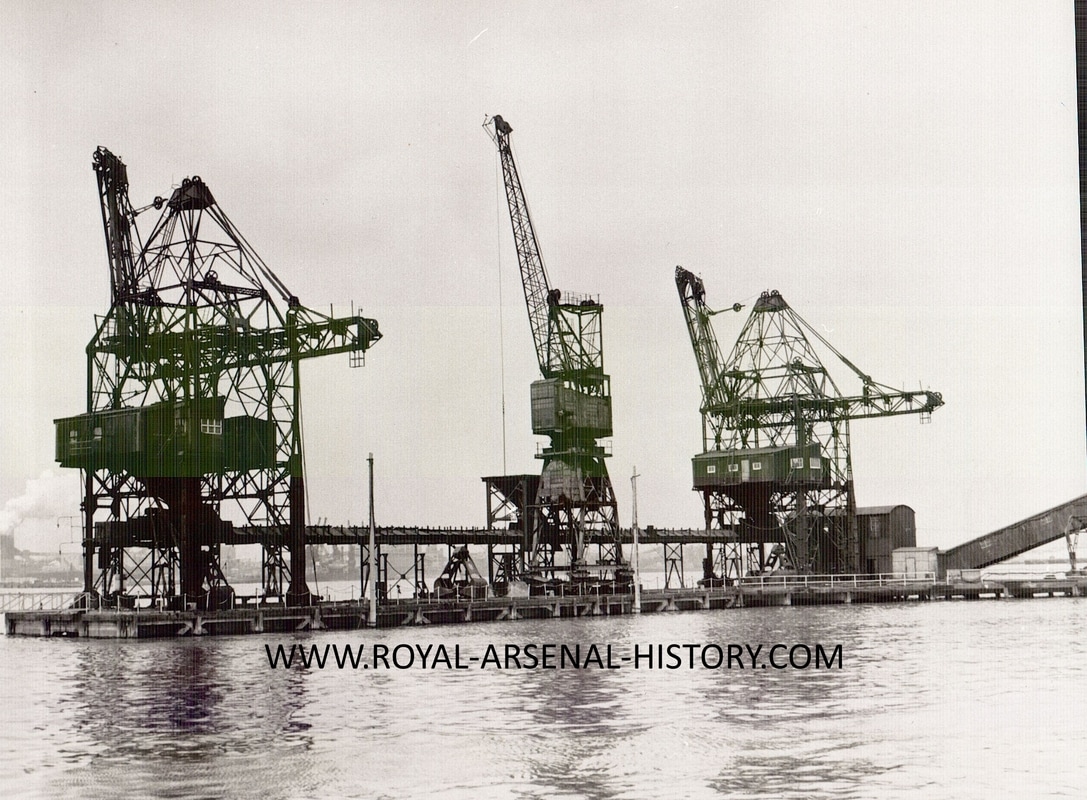
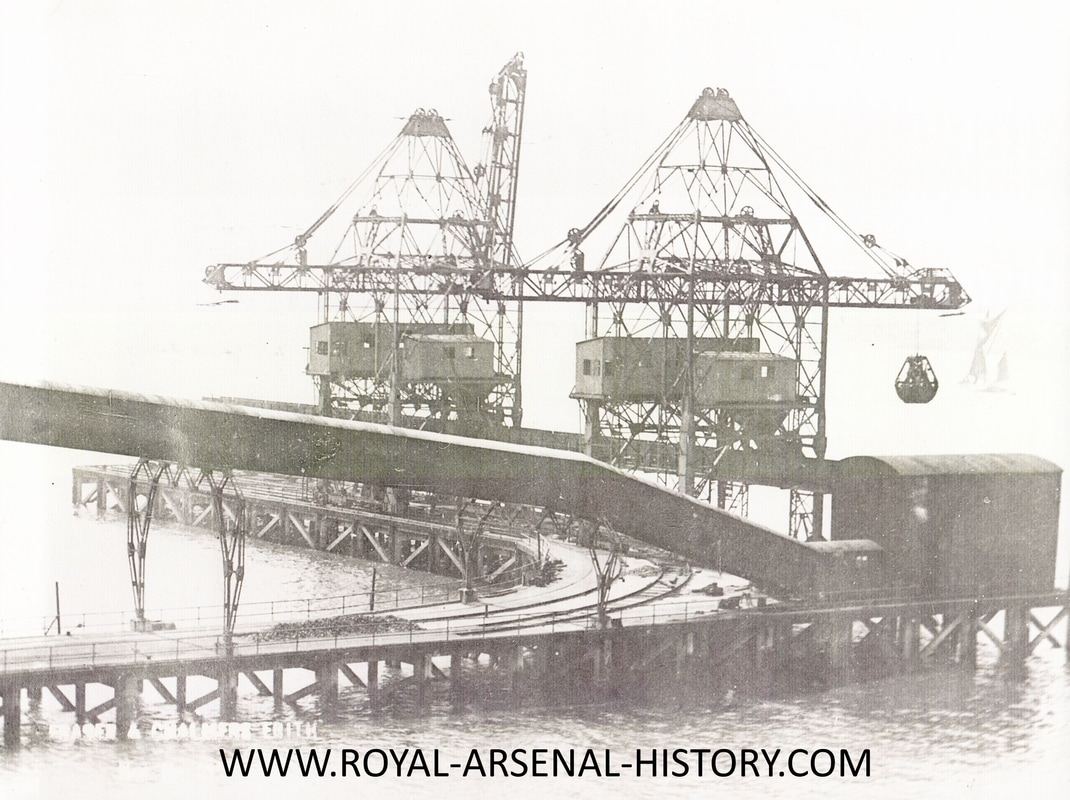
Left Western, Middle Stodhert, Right Eastern Crane
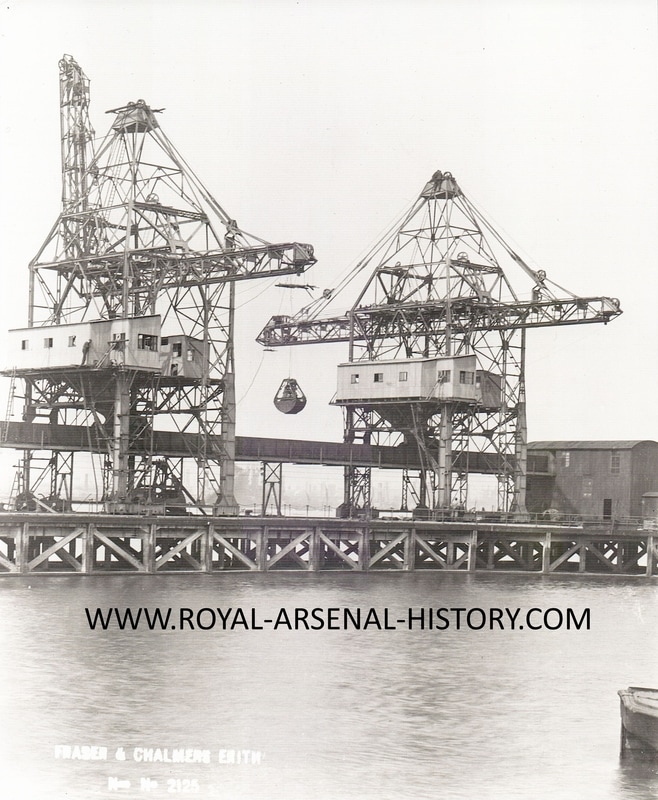
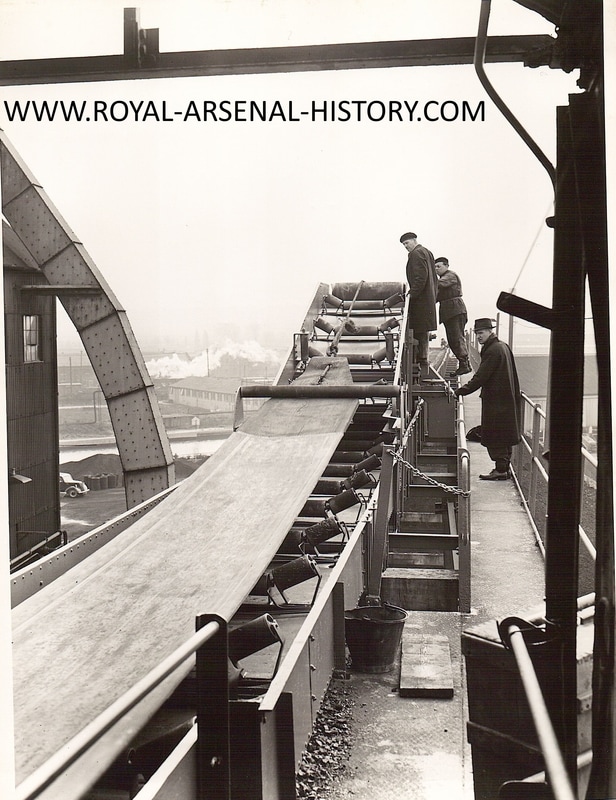
"A" Belt and x2 Jibs
Cranes, Two transporters and one level luffing crane (Stothart & Pitt).
The transporters had grabs capable of lifting six tons of coal at a time, the hoist motor
was a 80 HP DC motor, the cross travel was a 60 HP DC motor and had a 15 HP DC motor on each jib for lifting down and up when not in use. Red Navigation lights were fitted at the end of the jib and were lit when the jib was down on the river side.
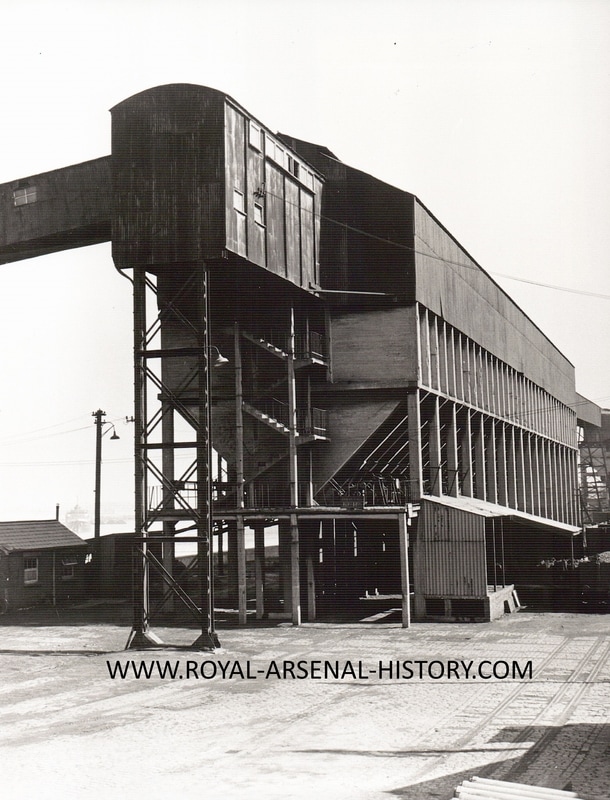
x2 Jibs, Coal pier crush house on right
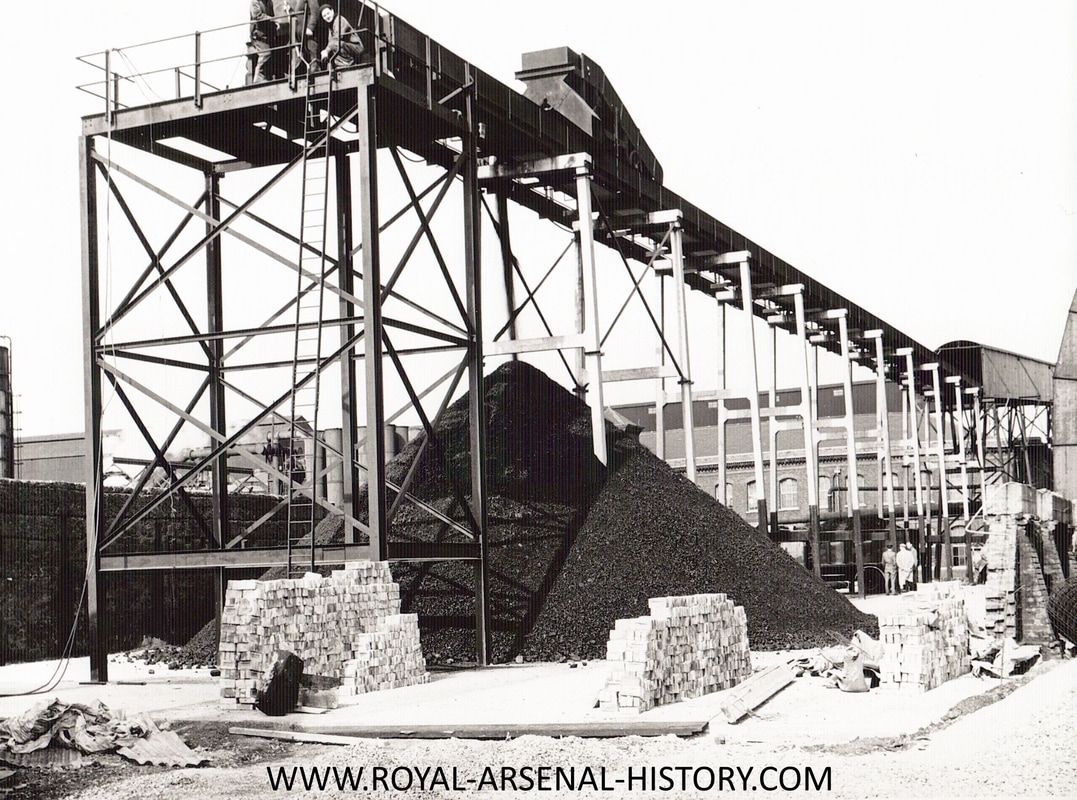
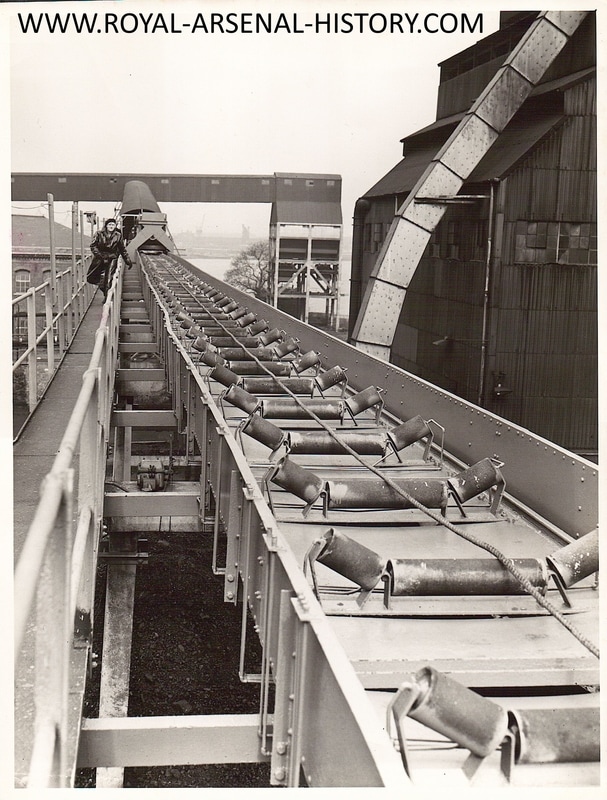
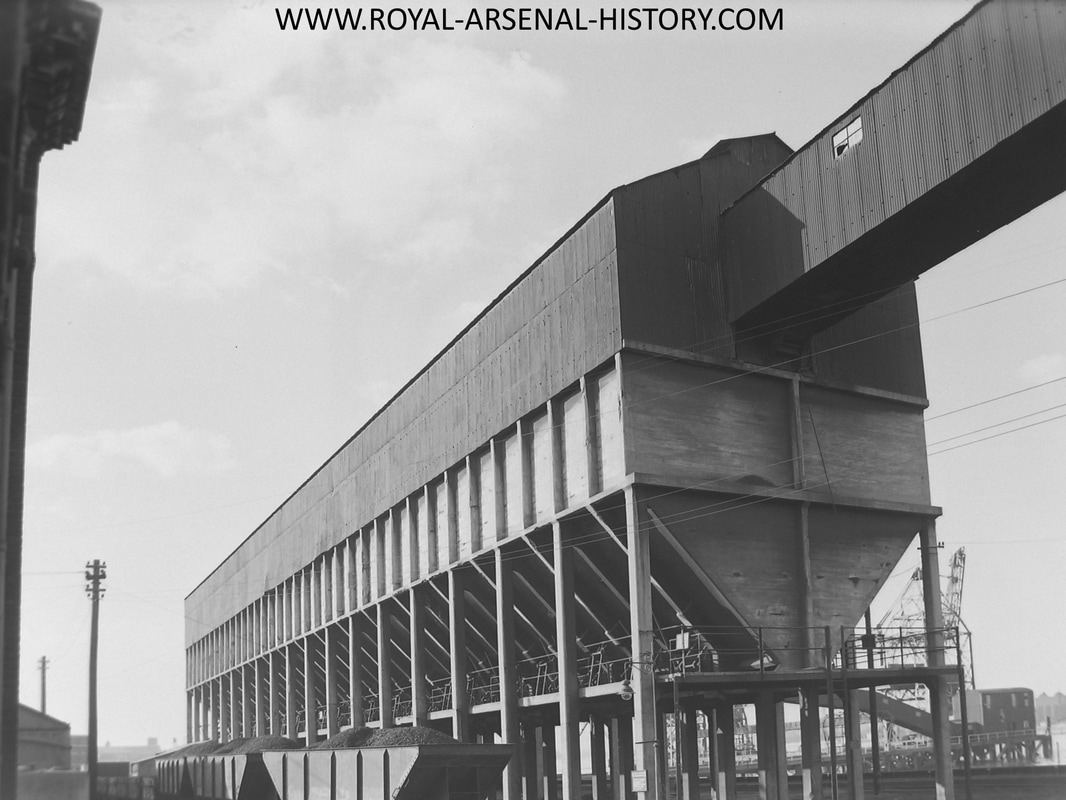
Belt A (30 HP DC motor) was the one that ran from East to West on the pier to the motor at the East end in the crusher house. Coal dropped through a grill in the crusher house on to belt B (driven by 80 HP motor DC ) that ran up to the coal hopper floor at approx. 40 degree angle 3O ft high. Coal was fed on to belt C (30 HP motor DC ) and this was diverted into the coal hoppers or, if Gas coal was being unloaded diverted on to belt D this again fed belt E (30 HP motor DC) to the Gas Factory coal yard. There was a hopper at the end of belt D This was not used after the belt E was installed to supply coal yard in Gas factory.
"E" Belts

Hoist motor gears
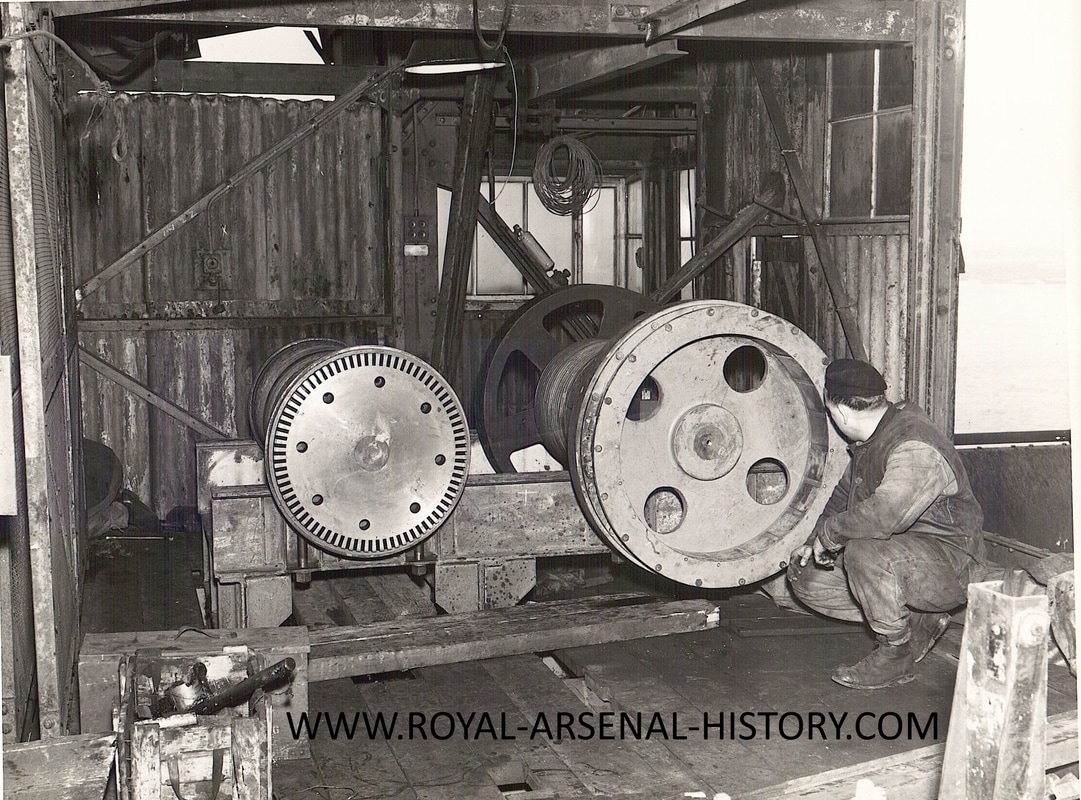
Hoist Motors
"B" Belt with hoppers
"B" Belt
Belt B was the longest at over 3OO yards belts were interlocked. A klaxon sounded before the belts started up C or E starting first depending on the type of coal steam or power station coal C B A & Transporter belts were started automatic in that order. Emergency stops were installed on each belt. A wire to adapted limit switches that ran the full length of each belt being fitted. When unloading a man was on patrol at each belt. Only two cranes were used at a time. There was a trimming gang of four men that used to shovel the coal from inaccessible parts that the grab was unable to reach into the centre of the ship. The drivers and trimmers were on piecework. Coal transported by railway trucks after weighing to the power station or coal yard E67 for E120 & EI20A boiler house and coal fields.
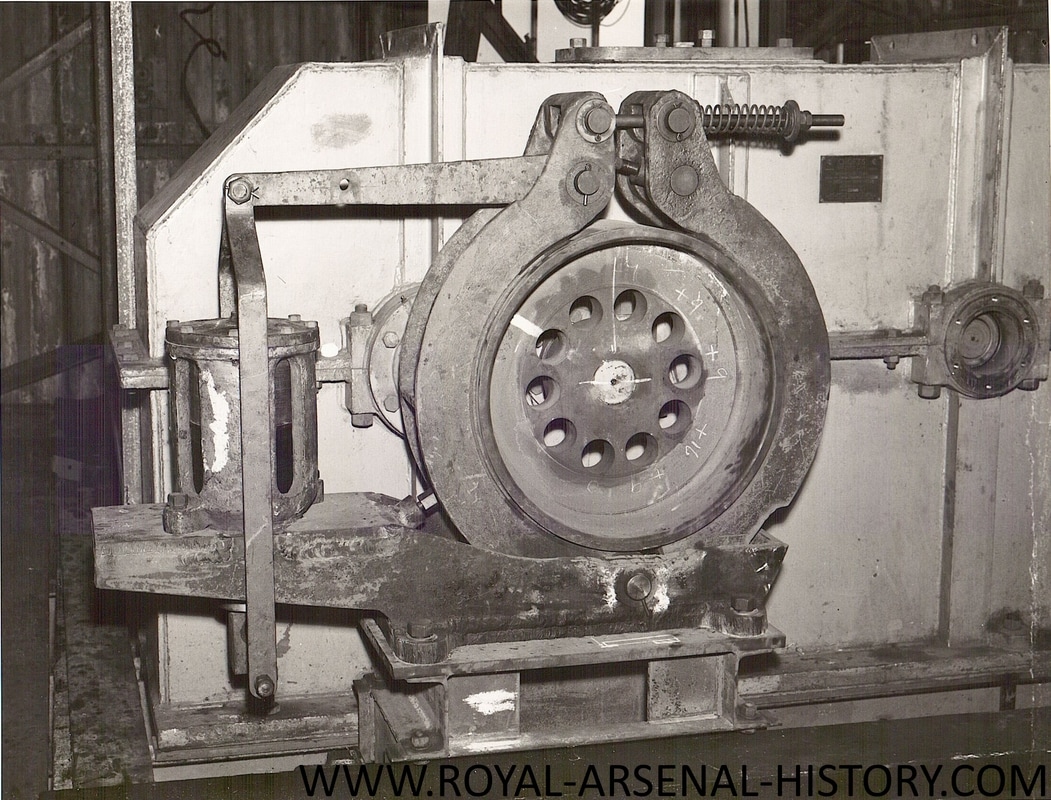
Break on hoist motor
The coal consumption was aprox 1500 ton per week. Charringtons ships The Lady Charrington & the John Charrington were the regular suppliers of power and boiler house coal. Cory ships supplying the steam and gas coal. Steam coal was the dirtiest and dust goggles had to be worn. Towels were cut up to cover the nose and mouth. Large pieces of coal were crushed in the crusher house There was a grill that the coal fell on from belt A to belt B stopping the large lumps damaging belt B, through the crushing machine back on to belt B.
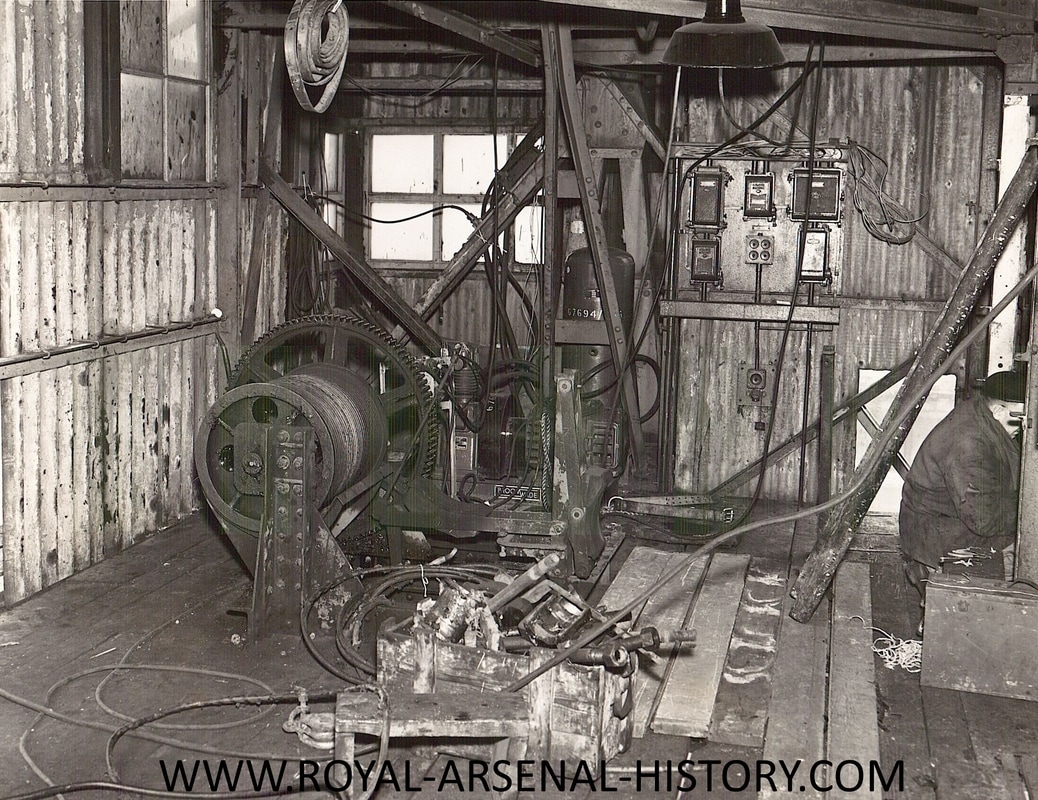
Cross traverse
Ships had to be unloaded in ordered time if not extra payment required. Ships were able to moor up within half an hour of low water. The tide was quite strong round the pier. There was no stopping for tea breaks. Crane wire ropes were inspected regularly.
The Transporters when not in use had to have hand brakes locked down and pins inserted through the brake and the travelling rail to prevent the crane moving in high winds (Dogging down). There was a wharf man responsible for tying up the ships, he had a hut on the T pier. After the unloaded ship sailed and cleaning up started, coal that had fallen off the belts was picked up. The supporting pulleys on the belts had to be greased and those that seized up attended to. Crane grabs and sheaves were greased. Electrical contacts on controllers and panels were cleaned, brushes on motors checked. Coil connections had to be regularly cleaned to avoid corrosion if you did not do this in the event of a coil replacement during coal the studs could easily break resulting in a great deal of extra time for repair.
The Transporters when not in use had to have hand brakes locked down and pins inserted through the brake and the travelling rail to prevent the crane moving in high winds (Dogging down). There was a wharf man responsible for tying up the ships, he had a hut on the T pier. After the unloaded ship sailed and cleaning up started, coal that had fallen off the belts was picked up. The supporting pulleys on the belts had to be greased and those that seized up attended to. Crane grabs and sheaves were greased. Electrical contacts on controllers and panels were cleaned, brushes on motors checked. Coil connections had to be regularly cleaned to avoid corrosion if you did not do this in the event of a coil replacement during coal the studs could easily break resulting in a great deal of extra time for repair.
"E" belt up to "D" belt

Renewing belt
E Belt
Hoppers
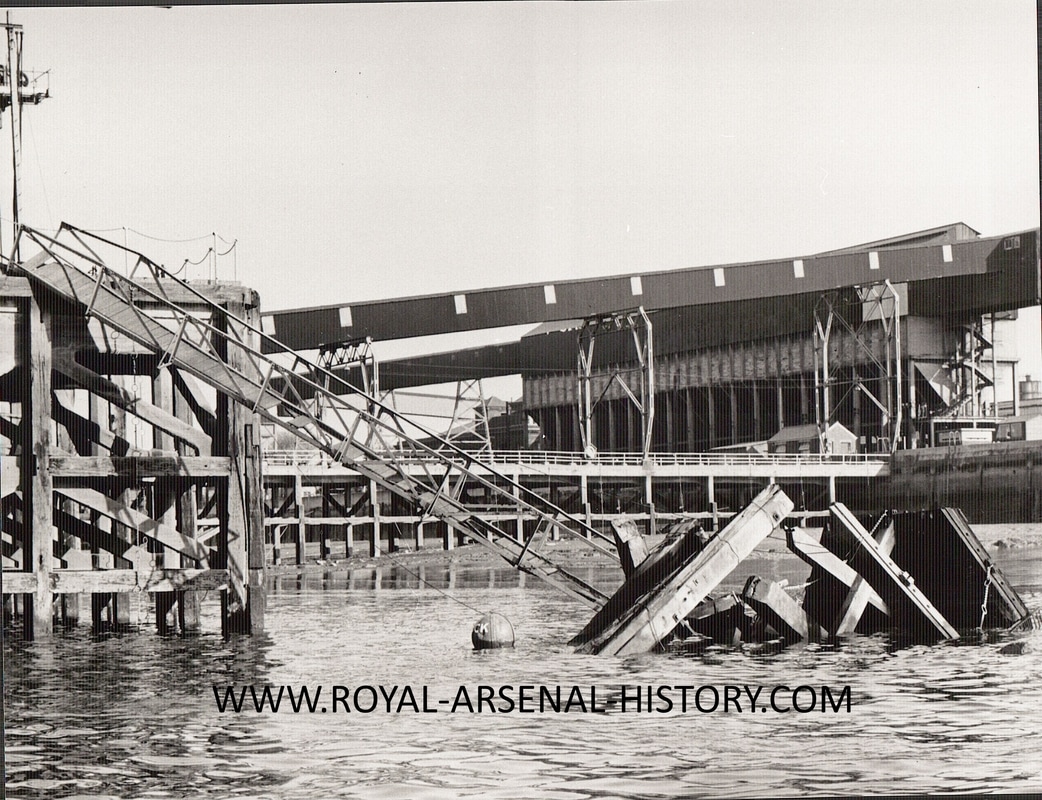
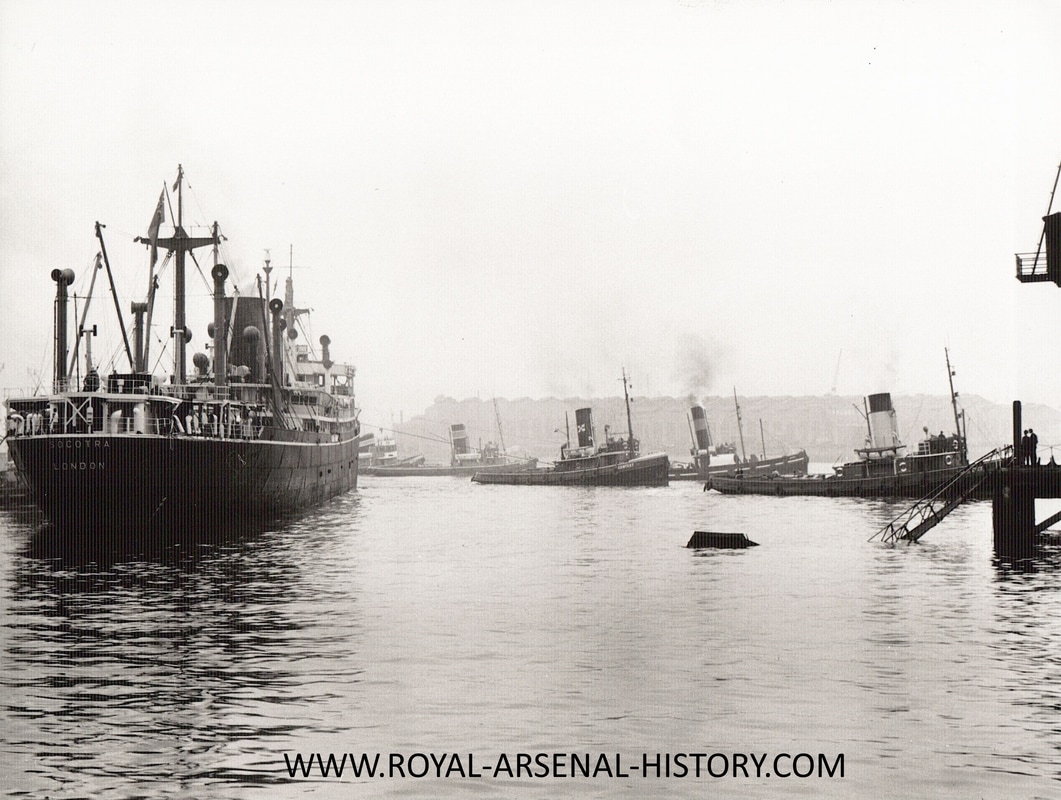
The Eastern transporter, and part of the eastern section of the pier, was badly damaged in December 1949. when the SS Royal Star was leaving, the Royal Albert Dock. The tug controlling the departure The tow rope was snapped on the tug and it backed into the pier, and a large hole was made in the stem of the ship. The pier was out of action for a short time and coal had to be transported in by rail and motor transport.
"B" Belt
The Eastern Transporter was damaged as a result the Transporter was modified The direct gearing was changed to reduction gearing and the opening of the grab changed from mechanical braking to compressed air These improvements substantiality reduced cut down the noise of the crane working. The Western Transporter was not modified till some 10 years later during the R A Estates period.
The Eastern Transporter was damaged as a result the Transporter was modified The direct gearing was changed to reduction gearing and the opening of the grab changed from mechanical braking to compressed air These improvements substantiality reduced cut down the noise of the crane working. The Western Transporter was not modified till some 10 years later during the R A Estates period.

Other Piers